Clip-in extensions have revolutionized the world of hairstyling, providing endless possibilities to transform your look instantly. Whether you want length, volume, or a new style altogether, clip-ins are a versatile and convenient solution. In this comprehensive guide, we will delve into the world of clip-in extensions and explore the various styles you can master with them.
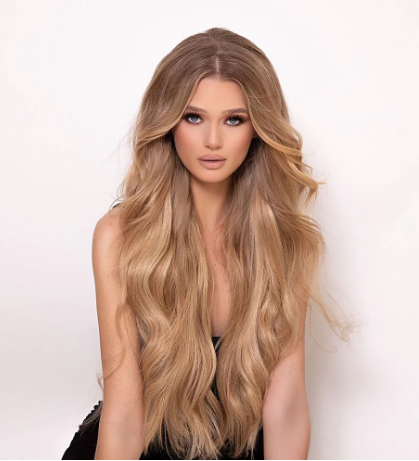
Styles for clip in hair extensions
We will walk you through five unique and trendy styles to try with your clip-in extensions, allowing you to unleash your creativity and elevate your hair game.
Style 1: Middle Part Magic
The middle part is a classic and timeless style that can be easily achieved with clip-in extensions. Start by sectioning off your hair down the middle, creating a clean and defined part. To avoid any visible lumps, place shorter pieces of clip-ins on top, blending them seamlessly with your natural hair. This style is perfect for creating a sleek and polished look for any occasion.
Style 2: Side Part Glam
No hairstyle can change your look as dramatically as a side part. To achieve this style, remove the top two rows of clip-ins and switch the part to the desired side. Clip the extensions back in, making sure they blend seamlessly with your natural hair. A side part instantly adds volume and creates a glamorous and sophisticated look that is perfect for special events or a night out.
Style 3: Mini Half Up
The mini half up style is a trendy and effortless look that can be achieved with clip-in extensions. Start by sectioning off the top half of your hair, leaving the rest down. Take the shortest clip-in and attach it closer to the ponytail to minimize any lumps. Then, gather the top section of hair, including the clip-in extensions, and secure it with a hair tie or bobby pins. This style adds volume and gives a playful and romantic vibe to your overall look.
Style 4: Half Up Half Down Chic
If you’re looking for a style that combines the best of both worlds, the half up half down style is the way to go. However, blending shorter hair with longer clip-ins can be a challenge. To overcome this, backcomb the crown area of your hair to create volume and then attach the clip-in extensions to ensure a seamless blend. This style is versatile and suits various occasions, from casual outings to formal events.
Style 5: Pretty Ponytail
A ponytail is a go-to hairstyle for its simplicity and elegance. With clip-in extensions, you can achieve a fuller and longer ponytail, even if you have shorter hair. Start by attaching the clip-ins to create volume and length. Pull all of your hair back into a ponytail, ensuring that the extensions are well blended and hidden. For added texture and dimension, you can add curls to the ponytail, creating a romantic and glamorous look that turns heads.
These are just a few examples of the endless possibilities when it comes to styling your hair with clip-in extensions. Feel free to experiment, mix and match, and create your own unique styles that suit your personality and desired look. Clip-in extensions offer versatility and allow you to transform your hairstyle effortlessly, making every day a good hair day.
Clip in hair extensions benefits
1. Convenient and Cost-Effective
Unlike other types of extensions, clip-ins are both convenient and cost-effective. They can be easily installed and removed at home, saving you time and money on salon appointments. You can reuse the clip-ins for different hairstyles and occasions, maximizing their value and sustainability. Embracing versatility with clip-ins means embracing a practical and affordable solution for achieving your desired hair look.
2. No Damage to Natural Hair
Clip-in extensions are a non-invasive method of transforming your hair. Unlike other extension techniques that require glues, bonds, or heat, clip-ins do not cause any damage to your natural hair. They can be easily clipped in and out, ensuring the health and integrity of your own hair. Embracing versatility with clip-ins means prioritizing the health and well-being of your natural hair while still rocking your desired style.
3. Instant Transformation
Clip-in extensions offer an instant transformation, allowing you to switch up your look and experiment with different styles whenever you desire. Whether you want to add length, volume, or a pop of color, clip-ins offer a quick and flexible solution without the commitment of permanent changes. Embracing versatility with clip-ins means that you have the freedom to express yourself creatively and adapt your hairstyle to suit your mood and occasion.
4. Enhancing Natural Hair
Clip-in extensions can work wonders in enhancing your natural hair. They can add fullness and volume to thin or fine hair, create length for shorter hair, and even provide a fresh start when your natural hair is not cooperating. By blending the clip-ins seamlessly with your natural hair, you can achieve a flawless and natural look that boosts your confidence and makes you feel fabulous.
5. Endless Styling Options
One of the biggest advantages of clip-in extensions is the endless styling options they offer. From sleek updos to voluminous curls, from elegant braids to chic ponytails, clip-ins give you the versatility to create any hairstyle you can imagine. Embracing versatility with clip-ins means staying true to your unique style and having the ability to transform your hair to match any look or trend that catches your eye.
How to put clip in hair extensions step by step
Before jumping into the exciting world of clip-in extensions, it is important to know how to properly install and style them for the best results.
Step 1: Prepare Your Hair
Start by preparing your natural hair. Ensure that your hair is clean, dry, and free of any styling products. Brush out any tangles or knots using a wide-toothed comb or a detangling brush. This will create a smooth base for the clip-in extensions to attach to.
Step 2: Section Your Hair
Divide your hair into sections to make the installation process easier. Use hair clips or hair ties to secure each section while you work on the remaining sections. This will prevent your hair from getting tangled and ensure a neat installation.
Step 3: Prepare the Clip-ins
Take out the clip-in extensions and lay them out in front of you. If necessary, trim the extensions to match the length of your natural hair. This step is particularly important if you have shorter hair, as it will help to create a seamless blend between your natural hair and the extensions.
Step 4: Start with the Bottom Layer
Begin by attaching the clip-in extensions to the bottom layer of your hair. Start from the nape of your neck and work your way up. Take a thin section of hair and tease it at the root to create a slight lift. This will help the clips to grip onto your hair securely. Open the clips on the extension and clip them onto the teased section, as close to the roots as possible.
Step 5: Move to the Sides
Once the bottom layer is complete, move on to the sides of your head. Take sections of hair about an inch wide and repeat the process of teasing the roots and clipping in the extensions. Ensure that the extensions are evenly distributed and securely attached for a natural-looking result.
Step 6: Finish with the Top Layer
Lastly, work on the top layer of your hair. This is the layer that will be most visible, so take your time to ensure a seamless blend. Take small sections of hair near the crown area and attach the clip-in extensions, making sure they are hidden and not visible from the top.
Step 7: Style as Desired
Now that the clip-in extensions are in place, you can style your hair as desired. Use a curling iron, flat iron, or other styling tools to create the desired texture and shape. You can also experiment with different hairstyles, such as updos, braids, or ponytails, to showcase the versatility of clip-in extensions.
Step 8: Blend and Adjust
After styling, take a moment to blend the clip-in extensions with your natural hair. Gently brush or comb through the hair, ensuring that there are no visible lines or gaps between the extensions and your natural hair. Make any necessary adjustments to achieve a seamless and natural-looking finish.
By following these step-by-step instructions, you can confidently install and style clip-in extensions to achieve a stunning and transformed look.
In conclusion
Clip-in extensions are a game-changer in the world of hairstyling. They offer convenience, versatility, and a range of styling options that can enhance your natural beauty and boost your confidence. So, embrace the power of clip-ins and let your creativity run wild – there’s no limit to what you can achieve with these handy and transformative hair accessories.